acevegantt: A Free and Open-source Full-stack Gantt Chart Implementation for Managing Academic Events
Download ZIP File View on GitHubacevegantt.
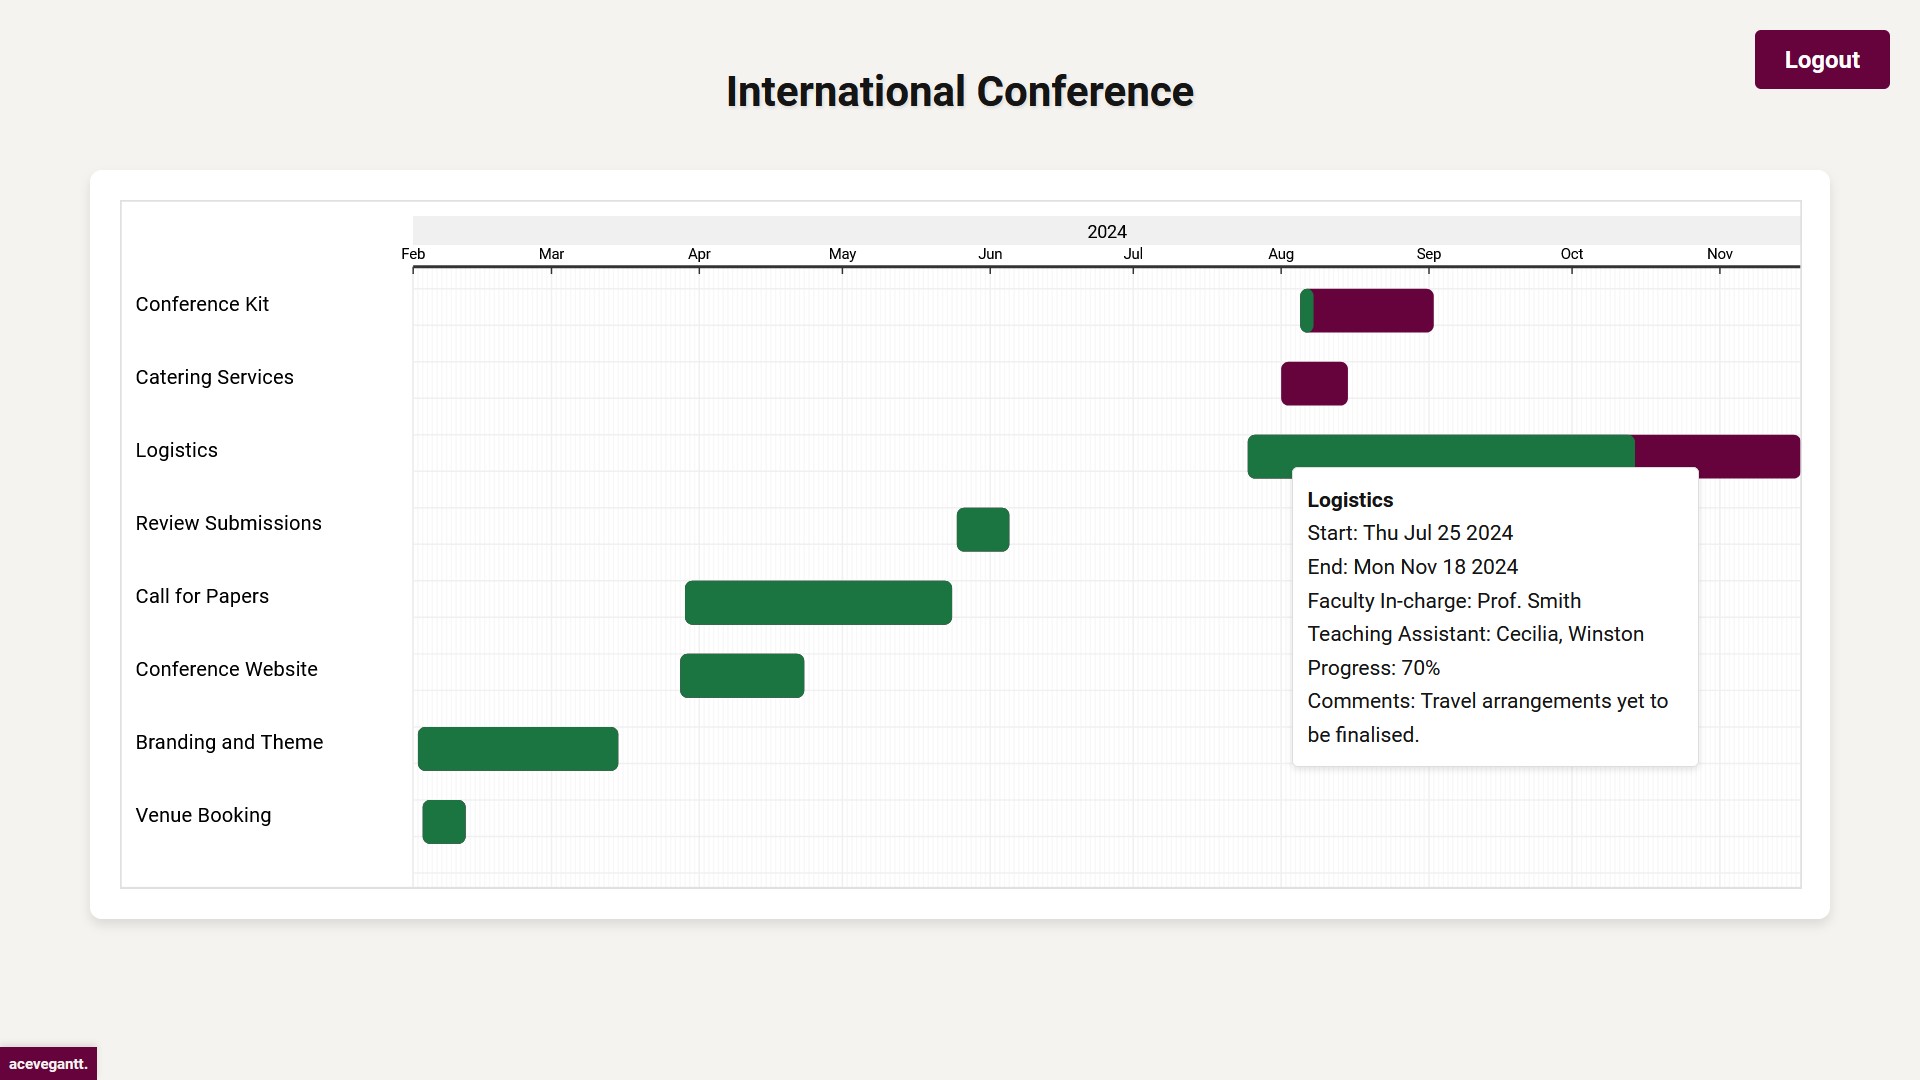
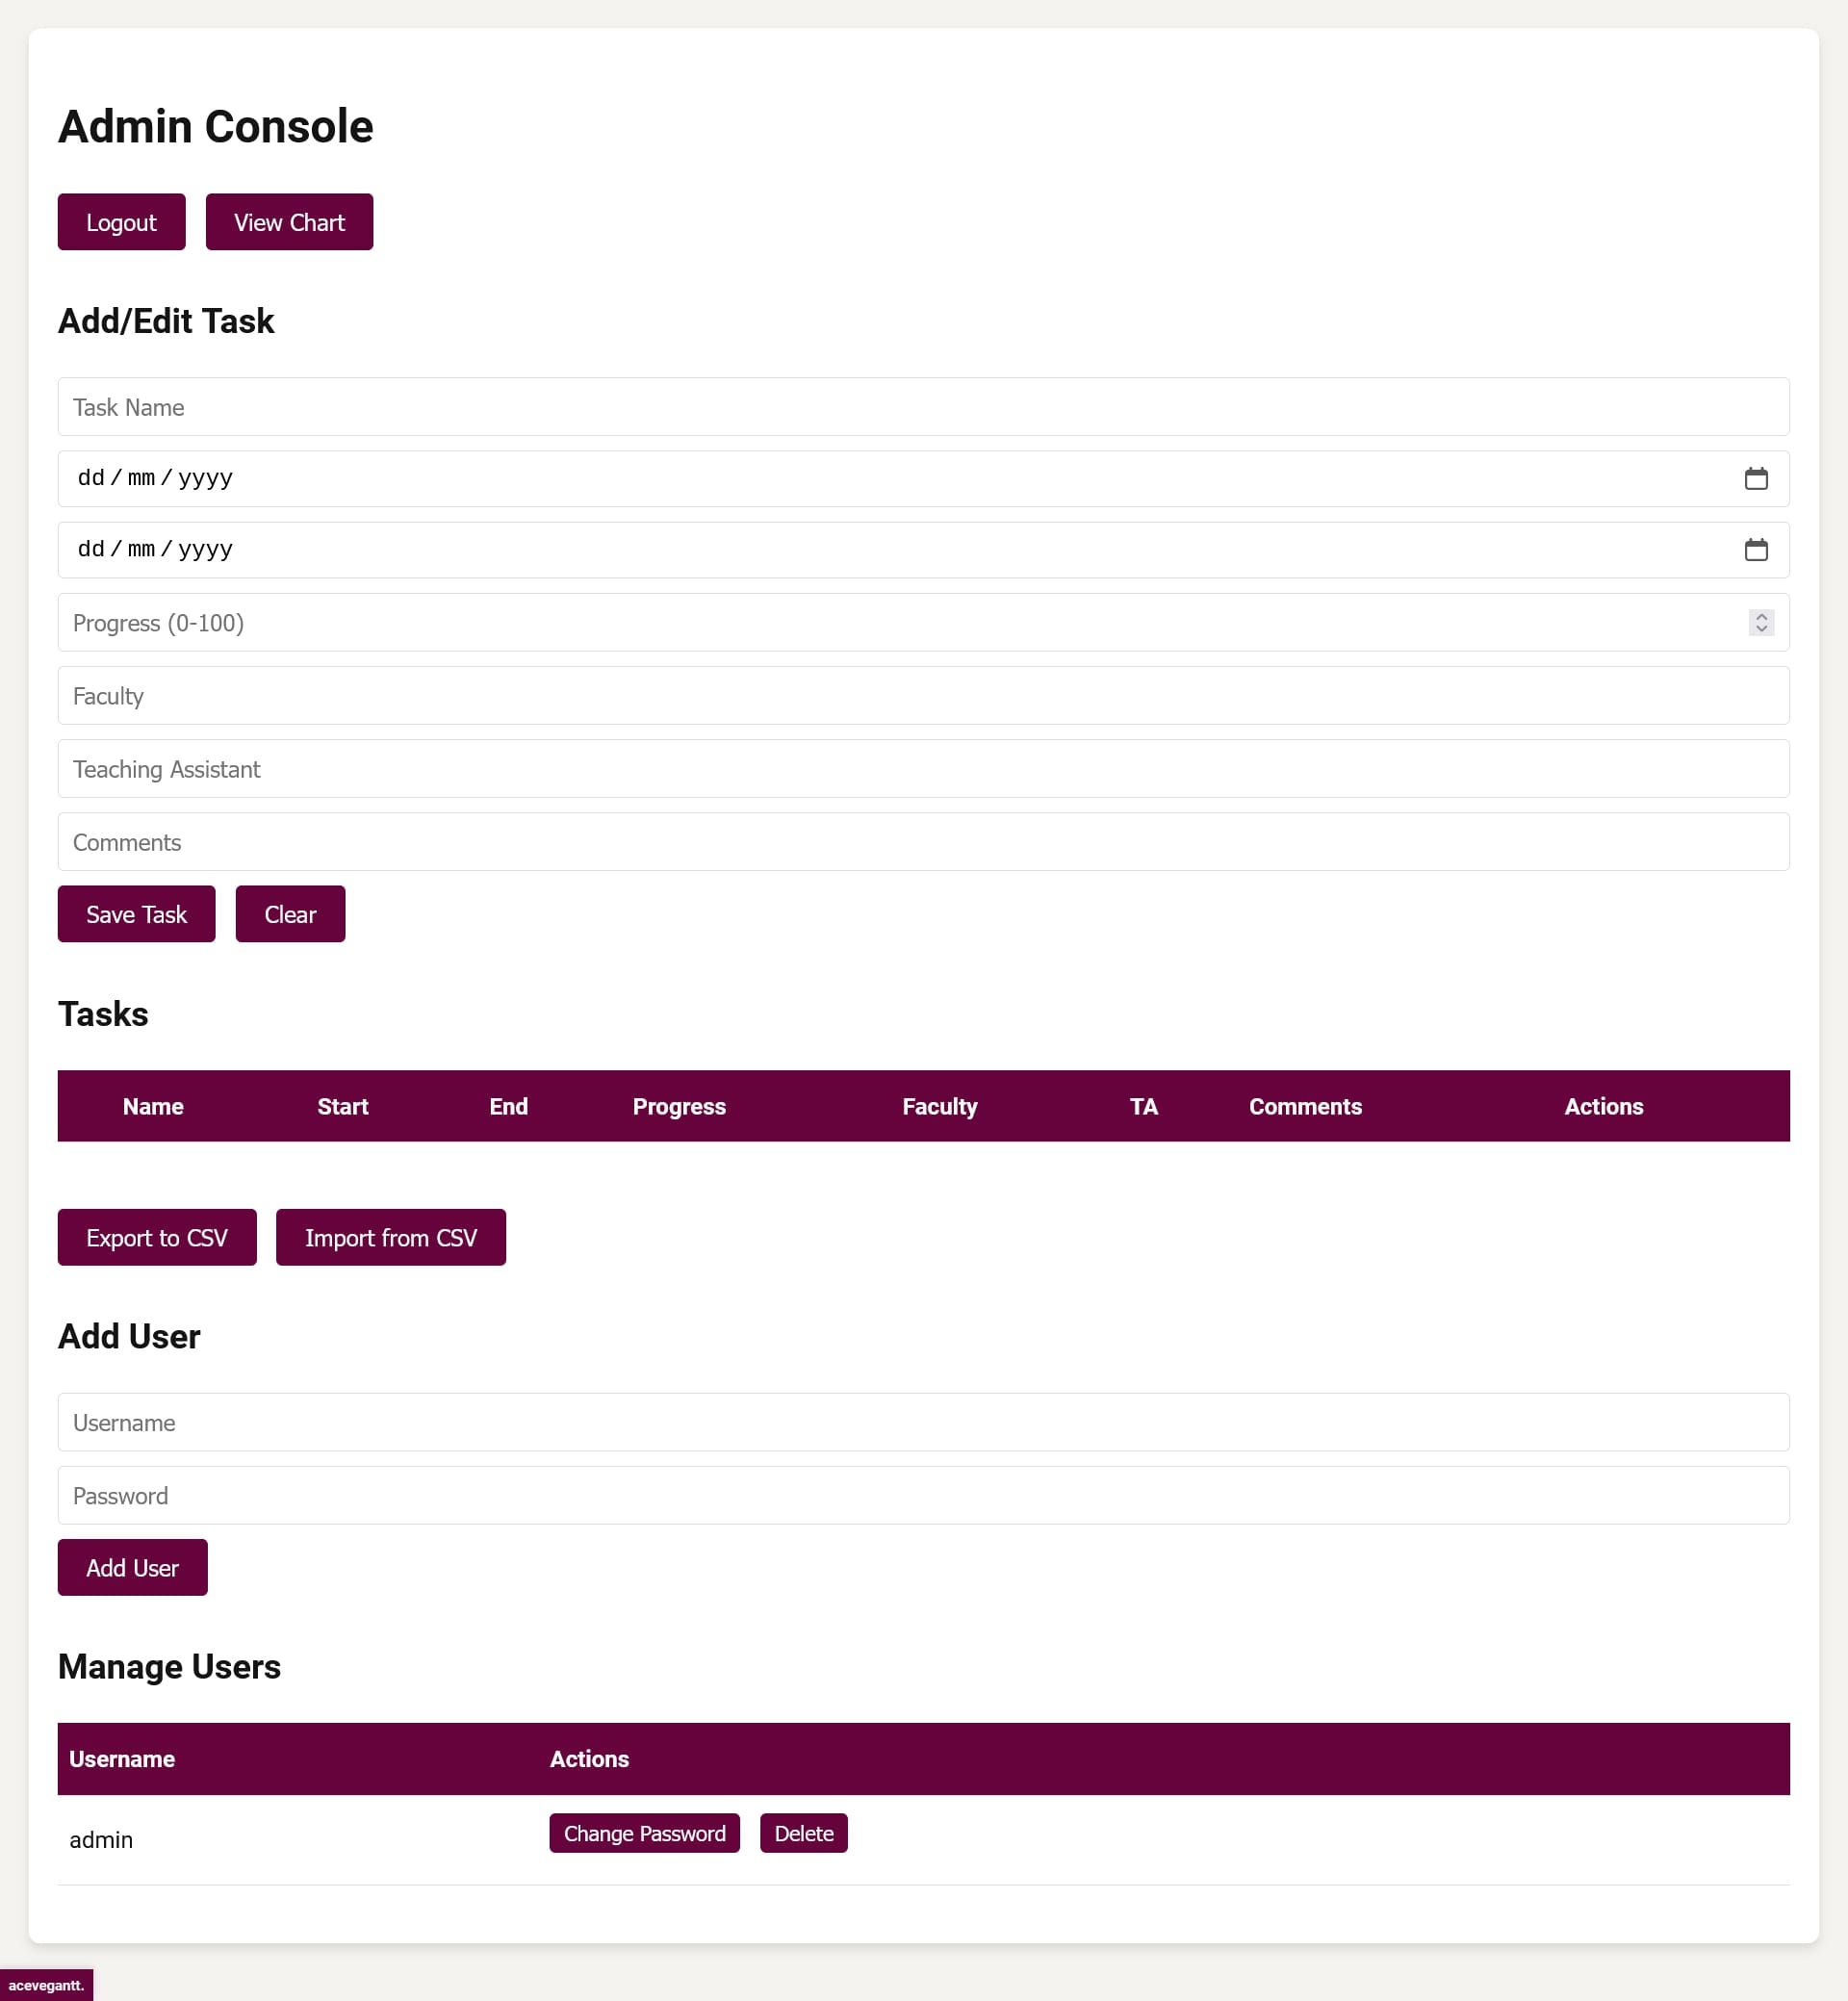
acevegantt. is a free, open-source, full-stack Gantt chart implementation tailored for academic event management. It provides a simple admin console for managing users and adding or editing tasks rendered to authenticated users on the frontend interface as a Gantt chart. While acevegantt. is custom-built for internal tracking of academic conferences, workshops, etc., it is adaptable with minor modifications for other event formats and use cases.
Requirements 📋
- Node.js
- npm (usually comes with Node.js)
- Firebase BaaS (available with Google account)
Usage 💻
-
Download the latest release from the releases page and extract the zip file (recommended approach). Alternatively, clone the repository using the
git clone https://github.com/ekjaisal/acevegantt.gitcommand. -
Navigate to the acevegantt directory and install all the necessary dependencies by running
npm install. -
Set up the database from Firebase Console → Create a Project → Build → Firestore Database → Create Database.
-
Generate a new private key for the service account from Project Overview → Project Settings → Service Accounts → Generate New Private Key and save the downloaded file as serviceAccountKey.json in the backend sub-directory within the acevegantt directory.
Note: Do not upload the serviceAccountKey.json file to a public repository.
-
Configure the environment variables in the .env file in the root directory by replacing
your-project-idwith the Firebase Project ID andyour-jwt-secretwith a secret string for JWT encryption.Note: Do not upload the .env file to a public repository.
-
To create an initial admin user, modify the create-admin.js file in the root directory by replacing the
set_admin_userandset_admin_passwordwith the preferred admin username and password and runnode create-admin.jscommand. -
Modify the
Event Placeholderin index.html with the actual event name to be displayed in the chart interface. -
Run
node server.jsto start the local server. Access the chart interface from http://localhost:5000 and the admin console from http://localhost:5000/admin. -
To thoroughly test the implementation and see the live preview of modifications, run the local server using the
nodemon server.jscommand instead ofnode server.js.
Deployment 🚀
- Choose a hosting platform for deployment based on the project requirements—one with a generous, permissive free tier for smaller projects or a paid option for larger projects.
- Set up the environment variables from the .env file and any others based on the requirements of the hosting platform.
- Deploy the code following the hosting platform’s guidelines.
Third-Party Libraries and Services 🛠️
This project uses the following open-source libraries:
- Express for the web server framework,
- Firebase Admin SDK for database and authentication,
- bcrypt.js for password hashing,
- jsonwebtoken for JWT authentication,
- dotenv for environment variable management,
- CORS for Cross-Origin Resource Sharing,
- SortableJS for tasks list management, and
- Roboto Font for UI typography.
License 📄
This project is licensed under the BSD 3-Clause License. See the LICENSE file for details.
Disclaimer 📣
This setup is provided as-is, without any warranties. Users are responsible for ensuring that their use of this implementation complies with the terms of service of Firebase and the hosting platform.
Acknowledgements 🤝🏾
acevegantt. has benefitted significantly from the assistance of Anthropic’s Claude 3.5 Sonnet with all the heavy lifting associated with coding and some of the many ideas, suggestions, and feedback from Sarah Harniswala.
